• Work
  • Design
  • Shop
  • Blog
  • About
Jess Rooney Deane
  • Work
  • Design
  • Shop
  • Blog
  • About

Favourite art materials

Since finishing college, I've been focusing a lot more on my illustration and the pieces I want to create or what I have been creating for clients. Since I have been working in my own studio space, and not lugging all my materials in and out of college, i've noticed a lot more of what i've been using lately, and what I have been loving. I wanted to share with you the materials that I think work the best for me and why I love them.

After deciding to write this blog and laying out everything I needed to account for, I realised I use a lot of different art materials. Now, I don't use these every day, or for every project but these are the main things I have in my desk and what i'll grab when creating a new piece. I'll try link everything so that, if you like the sound of it, you can get it for yourself. 
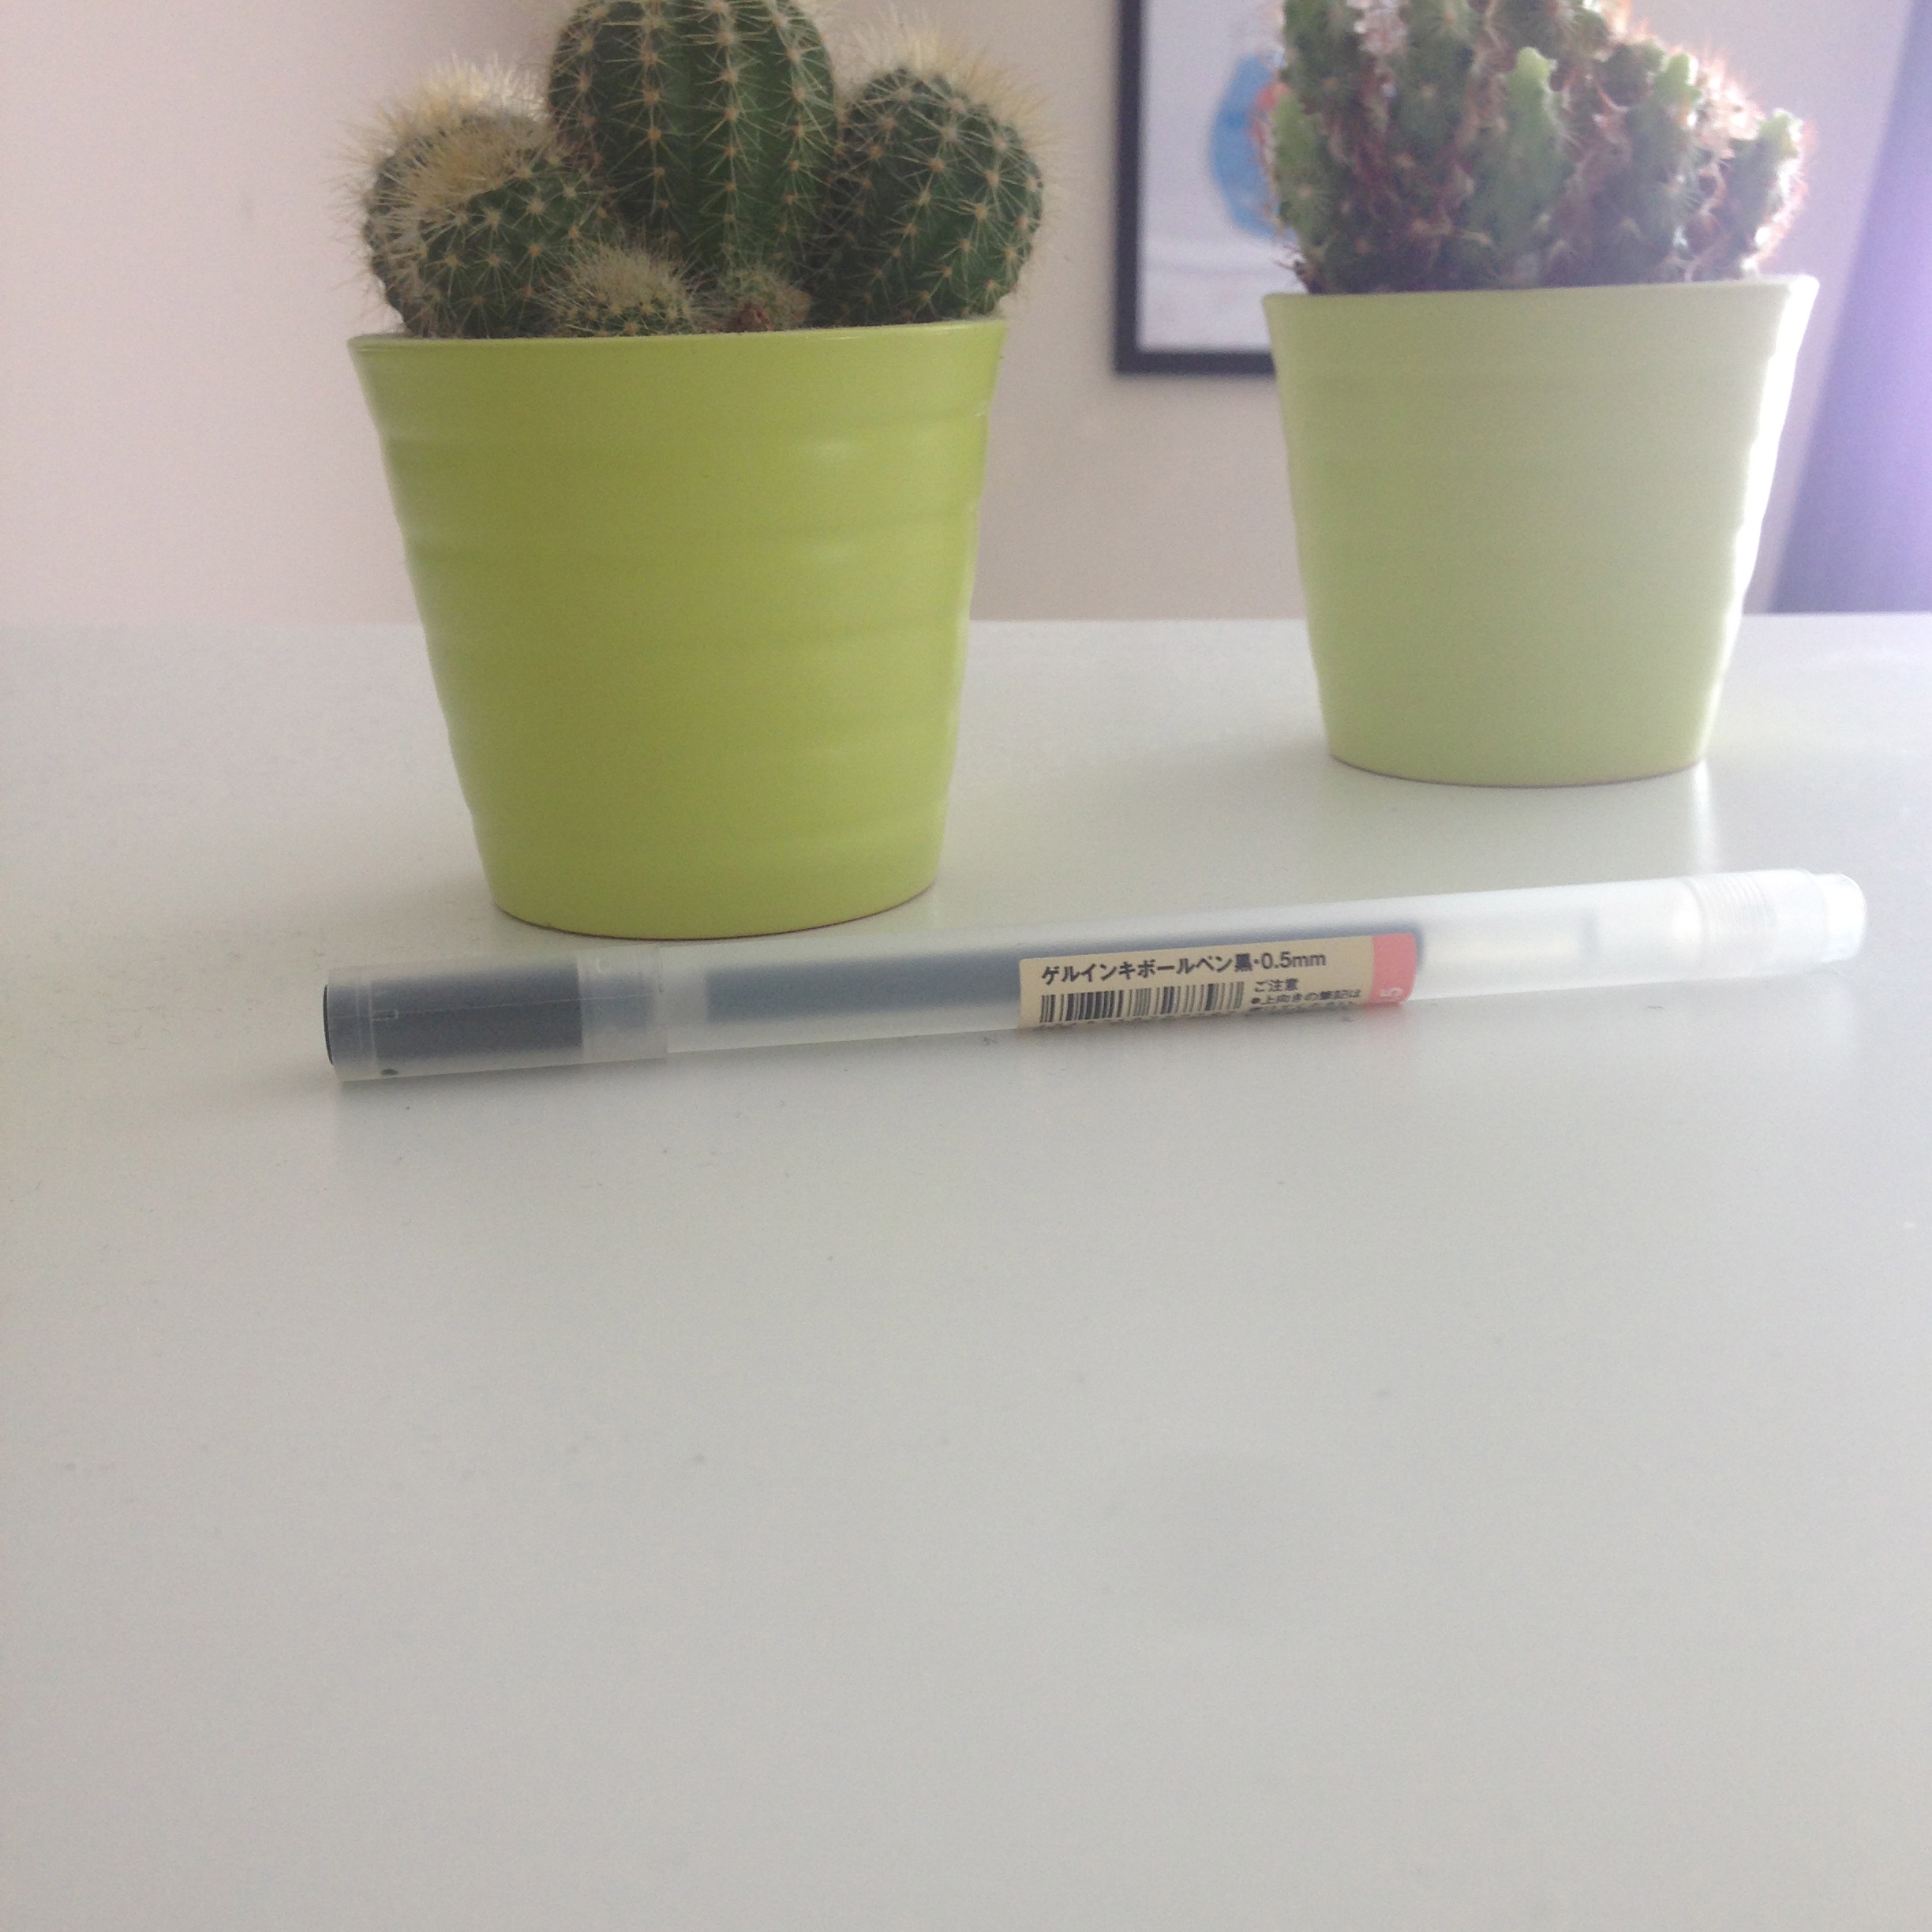
Muji pens
If you already seen my July Favourites you'll already know that I have a new found love for these pens. I find they're so easy to use to get a good line and they come in a variety of colours. You can buy them online or in the Muji shop off Grafton street. 

Winson & Newton watercolour palette
I got this during my portfolio course and haven't stopped using it since. It's a well loved item and most of the colours I have are almost completely used up. This palette is so handy as you can use the lid to mix the colours on and all of the colours can be changed to suit the palette you want. My palette came with 12 colours which are Cad yellow pale, Cad yellow, Viridian green, Sap green, Chinese white, Yellow ochre, Burnt sienna, Cobalt blue, Aliz crimson, Cad red pale, Burnt umber and Ultramarine. You can buy all the colours separately as well, and change the palette to suit you. You can buy this palette from Evans and Easons in store, or here, or there is a similar one here.

Letraset Promarkers
I like these markers as they have an opaque finish to them, so you can draw over them with a different colour and they will change to a mix of both colours. These are great to use when you want to see what something will look like in colour before you put it on screen. I also like these markers as they come with a thin side and a thick flat side. You can get them in Easons and Evans, and also from amazon.

Tweezers
These are great for when i'm making my paper illustration because if you have a small piece of paper that needs to be stuck down then you can do it with precision with the tweezers, it also saves you from getting glue all over your fingers.

Scalpel
This is a necessary tool for making my paper illustrations, and cutting anything really as you can always get a precision line. I use the Swann-Morton scalpel with 10A blades. I usually wrap the handle with a lot of masking tape (as you can see in the photo below) to stop getting blisters on my fingers from the constant rubbing of the metal on my skin when i'm using it.

Art & Hobbie shop paper
This paper is great as they usually have a variety of colours and textures to choose from. You choose a normal folder (€5) or a large folder (€10) and fill it with whatever paper you want and then you pay for it. Simple.

Pentel watercolour travel brush
This brush is amazing for using with watercolour, you simply fill it with water and it's ready to use whenever you want. The tip is thin and flexible as well so you can use it for a variety of lines or details. It's so handy on the go too because the water is already in the brush so there's no need to bring a little water container with you.

Cutting mat
A much need accessory for making my paper illustrations and for cutting my prints down to size. This is also good as it is gridded so you can line up your print and cut it correctly. You can get the same A3 one I have here.

Notebooks
I like to try out and use a variety of different notebooks. I like to use my Moleskin notebook when I know I need thick paper for painting or using markers as they never seep through to the other side of the page. I really like Muji gridded and dot notebooks for working out lettering pieces and other designs with precision. Paperchase have a beautiful range of sketchbooks with amazing covers on every one, or you can get good quality, plain classic ones.

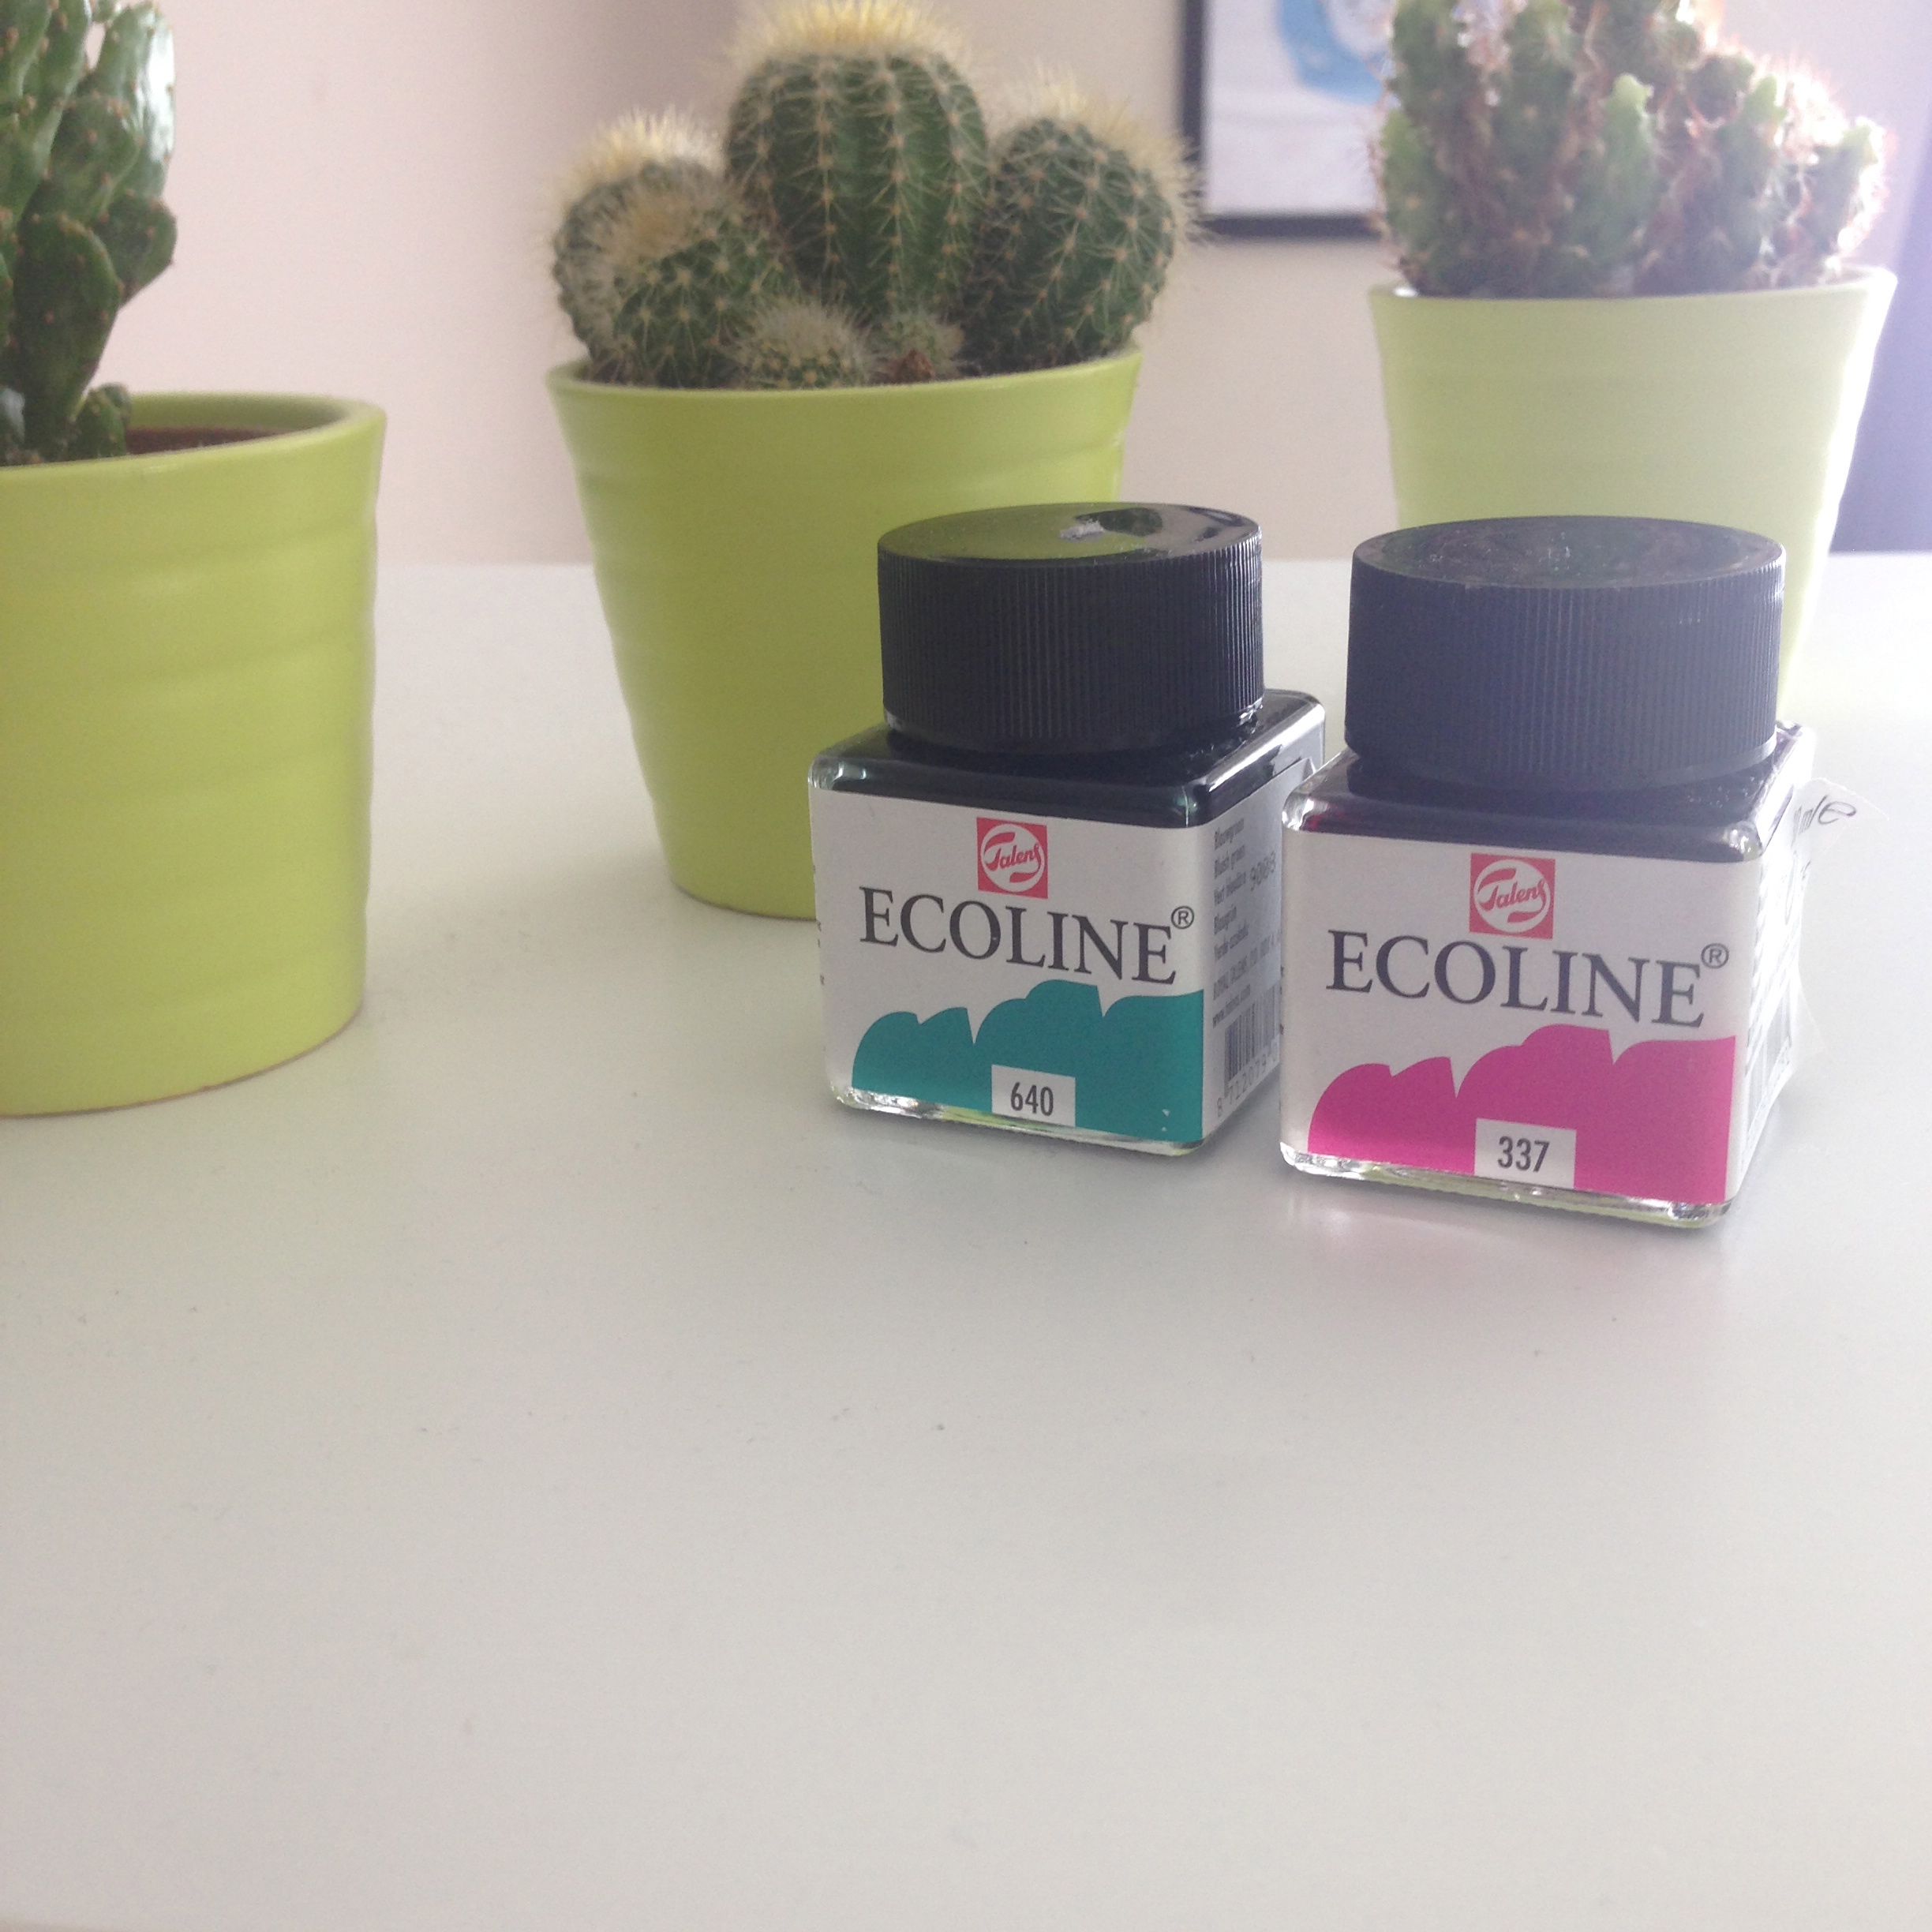
Ecoline liquid watercolour
If you seen my July Favourites you will have also seen these. These are amazing for getting a solid colour without having to mix any colours together. They come as a little pot but last for ages, as a little goes a long way. You can buy them here.

On.The.Run:202 luxusliner
This market is great as it has a fine tip so it's great for outlining a drawing or creating some hand lettering. I bought this from All City in Temple bar, Dublin.

Uni Pin fine line pens
I really like these pens as they come in a variety of sizes. My favourites to use are the 0.05mm pen for when I need to draw with a really thin line, the 0.2mm pen for drawing normal lines, and the 0.8mm pen when I need a thick line but don't want to use a marker. You can find them here.

Extra things which don't really need explaining:
Pritt stick
Rubber (eraser)
2B pencil
Tissue (for watercolour brush)
Metal ruler
Watercolour paper (300 gsm)
 

These materials are the main things that I use physically from day to day. There are so many more materials that I could name that I might use on the off chance for one or two projects but these materials are my most loved ones when doing things by hand before editing or doing something digitally. Let me know what your favourite art materials are!

Enjoy,
Jess x

tags: art, materials, illustration, pens, watercolour, ink, pencils, paper, brushes, muji, ecoline, blades, palette, fineline, promarker, moleskin, paperchase, pencil, art and hobbie
Wednesday 08.05.15
Posted by Jessica Rooney Deane
 

July Favourites

As this weeks blog post was near enough to the end of the month, I thought i'd do a little favourites piece. I wanted to mention a range of things that i've been loving for the month of July. There is a mix of things from tv shows to art materials. I've talked about them in a bit more detail below so read on.

1. Liquid watercolour
I've really been enjoying using these little pots of liquid watercolour from Ecoline, which I bought in Evans art supplies. I got the Magenta one (337) and the bluish green one (640), and then were €2.99 each in store, or you can get them online here. They're amazing to use because you get a really strong colour first hand, also because you're buying a specific colour, you know what you're going to get without having to mix anything else to get the colour you want.

2. Elastic bobbins
These are basically a bobbin made from a piece of soft fabric elastic that is tied together. I really like them because they don't have that crap metal bit that pulls half your hair out, and it's stretchy and soft enough that it doesn't leave you with a weird bobbin mark in your hair. These are great as well as you can pop them on your wrist and they look like a colourful festival bracelet too, while not cutting off your blood supply like other bobbins do. I got this ones from H&M, in a pack of 6 different colours for €2.99. I couldn't find any online to link them here, but they're in most H&M store and I even think I seen them in Penneys recently. I've also seen a good few DIY pins on pinterest, as it is essentially just a piece of elastic tied on one end. 

3. TAE
I feel like this would always be in my monthly favourites, regardless of the weather. I seriously don't think I could survive my day without a few giant cups of tea in one of my Disney mugs (basically like soup bowls). And yes, you've probably guess from the illustration that I'm a Lyons tea woman all the way! 

4. PosieTint
This is still one of my favourite Benefit products without a doubt. I've been especially loving it for the summer time as it gives your lips a pretty pink tone, so it looks lovely with a tan (not that I have one yet) and nice dewey summer make up. I can't get enough of this stuff and it lasts forever cause you only ever need a light layer on your lips, and it usually stays on for most of the day (depending on how much you're eating) because it's a lip stain. You can buy it from any Benefit counter or shop, online or instore in places such as Debenhams, Arnotts, Boots, etc. or you can head to the Benefit shop on South William street.

5. Muji 0.5mm pens
This is a recent summer find which I am loving! I was always so used to using the unipin fineline pens, which I still love, but because I lean so heavily on the pen it usually wouldn't last that long (as the nib would disappear). In that way, this pen is perfect because it has a ball point tip and because it's inky it works in the same way as the fineliners. This pen was around €2.20 and I got it from the Muji shop off Grafton Street. They also come in a huge variety of colours, so i'll definitely be going back to get more!

6. Once Upon A Time
This is a TV show I discovered on Netflix after binge watching and finishing all my other beloved shows. I thought i'd give it as shot because of the fairytale/Disney aspect to the storyline, and after the third episode I was hooked! I LOVE IT! This is an old enough show now, I think it started in 2011 and all 4 seasons are on Netflix to watch, so I'm already nearly finished season 1. I really enjoy the storyline as you can try and guess which each character is as they are introduced to the storyline.

7. Malteasers
You can basically blame every supermarket for these being in my favourites this month. They've been on special for €1.50-€2 in most places like Dunnes and Tesco all this month and I couldn't help but buy them (and devour them all!), plus they go really well with my popcorn addiction.

8. Levi shorts
I got these shorts from a seller on Etsy a few years ago and fell in love with them even more this summer. They're a little bit big for me, but with a nice belt, they hold up well. They're also so easy to wear, because I live in Ireland, you never know what the weather is going to be like on any given day, or even what it's going to be like during that day (raining one minute and sunny skies the next) so these shorts are a dream because you can pair them with a nice and cosy jumper or with a cute crop top. 

9. True Detective
We finally got around to watching the first season of True Detective and (OMG!) it's amazing! If you haven't seen it, it is definitely a must see! It was thrilling all the way through and became one of them shows that you can't wait to see the next episode or you stay up a bit later just to fit one more episode in. I didn't think that it was going to keep me on the edge of my seat for each episode but it did! Definitely check it out, if you haven't already! 

10. Snapchat
I've been loving watching snapchat stories this month, and creating hundreds of my own as well. I think it's really fun and interesting watching different bloggers and illustrators doing their thing and not really giving a crap what they say because it's going to be gone in a day anyway. I've been finding all of them hilarious and interesting all at the same time. If you have snapchat then add me @jessicard23. I've been snapping a lot of sneak peeks to my new projects coming up soon too!

Let me know in the comments below what you've been loving this month!
Enjoy,
Jess x

tags: once upon a time, debenhams, muji, posietint, arnotts, boots, benefit, tv show, true detective, liquid watercolour, netflix, H&M, levi, vintage, make up, tea, lyons tea, disney, malteasers, july favourites, favourites, illustration, fairytale, watercolour, pens, lip stain, chocolate, bobbins, shorts, snapchat, iphone, crime drama
Wednesday 07.29.15
Posted by Jessica Rooney Deane
Comments: 1
 

Quick and easy pasta sauce

This week I wanted to feature something quick and simple, and something I make nearly every week. When you've run out of ideas, or food, or you just want something easy to make, pasta is always the answer for me. It's filling, delicious and really quick to make. I was sick of buying different pasta sauces as they were always either expensive for a little pasta sauce or the sugar content was always way too high for a sauce. So I just started making my own. This one is really easy and the ingredients will probably be some of the things you already have in the press or if you need to buy them, then they should last you for a really long time. Now I know I'm not an Italian chef, or know much about cooking really, but I make this enough times during the week that I can guarantee that it tastes good!

You'll need:
1 box of Cucina Passata Sieved Italian Tomatoes (500g)
1/2 teaspoon of paprika
1/2 teaspoon of basil
1/4 teaspoon of parsley
1/2 teaspoon of pepper (coarse)
2 pinches of sea salt
1/3 teaspoon of chilli flakes (if you want it spicy)
1 clove of garlic (finely chopped or crushed)
1 fresh tomato (diced)
3 mushrooms (chopped)
olive oil
Also any added ingredients you like such as onion, peppers, etc.

What you need to do:
In a bowl add the passata sauce along with all the herbs and spices, and mix. Leave to one side.
In a pot add a small bit of olive oil and wait for it to heat up a bit.
Then add in your garlic, mushrooms, tomatoes, and any extra ingredients you like.
Wait around 3-4 minutes for the ingredients to cook a bit, then add your sauce.
Leave to simmer on a medium to low heat while you make your pasta.
Be sure to stir it every now and again so nothing sticks to the end of the pot.
When your pasta is ready, drain off the water and mix in the sauce on a low heat.
Then serve!

I hope this recipe comes in handy whenever you need a nice filling meal, or are too lazy to cook anything else. This is also a great recipe to have, as most of the ingredients will expire quickly so you can always have the basic recipe in your press. This sauce can also be used as a pizza sauce too for the base of your pizza, just leave out the whole ingredients such as the whole tomato and mushroom, and keep them as your toppings instead. There's also no need to cook it if your going to use it as a pizza sauce, just mix the passata, herbs and spices and add on the pizza base!

Enjoy!
Jess x

tags: pasta, cooking, italian, sauce, recipe, food, ingredients, aldi, homemade, pasta sauce
Wednesday 07.22.15
Posted by Jessica Rooney Deane
Comments: 1
 

Lettering - from sketches to final pieces

This week I wanted to talk about my work a bit more but didn't know where to start. After looking at all my recent work I thought that since I was doing a lot of type and lettering pieces that I should talk a bit more in-depth about that and how I get from sketches to the finished pieces. I also thought it would be nice to show some of the sketches that I do on paper before I move on screen so you can see a bit more into my process and how I work. 

Sketches that we're used and the final piece.

Sketches that we're used and the final piece.

Firstly I usually do a few tiny sketches so I can look at type layout and the placement of the words, and then i'll find one I really like and work that up on a larger scales so I can get a good feel of how it's going to look. After that I'll probably decide the shapes of the lettering and how I want them to look, such as squiggly lines, thick bubbles, signature style, etc. This usually changes depending on how it ends up looking on screen but usually I end up sticking to the way i've sketched it all out.

When the hand drawn sketch is finally at a point where I like it then i'll scan it in and place it on a layer on my file on Illustrator. I'll usually lock this as a layer and use it as a sort of guide for the digital drawing. Then using my Wacom Bamboo drawing pad I'll start drawing the digital letters. I really love this drawing pad as it's so much easier than using a mouse or trackpad for getting the shape of the lettering that you want. And especially for the attached hand writing, because it's so easy to get a good flow to the whole word when you're using a stylus pen. I'll usually draw and re-draw it a few times until i'm completely happy with the shape of the design and the letters. Then I'll clean up any mistakes or lines I didn't mean to do. After that's all done, I'll start playing around with the colour of the lettering and different added features such as lines and dots. Then i'll print it out, if it's going to end up being a printed piece, just so I can see how it will look and how all the colours look together, and if I need to change anything.

This is the process I use for most of my lettering pieces, but some differ as sometimes I use illustration pieces with the digital lettering, or sometimes I'll want a less digital looking style to the piece so I'll do it all by hand on paper (usually in acrylic paint, a 0.5mm Muji pen, ink and a paintbrush or with an On The Run:202 Luxusliner with a fine tip), scan it in and work with the hand drawn piece till i'm happy with it and then play around with the colour. I'll talk in more detail about the specific products I love to use in another blog post soon!

This is a little gif to show you how the piece looks on paper compared to how the finished piece turned out.

This is a little gif to show you how the piece looks on paper compared to how the finished piece turned out.

Hope this puts a good perspective on how I get from point A to point B when creating lettering pieces, and hopefully inspires or helps you if and when you are creating your own lettering piece. All the finished lettering pieces can be found in the lettering section on my website.

Enjoy your week,
Jess x

tags: lettering, typography, sketches, hand lettering, type, design, hand drawn
Wednesday 07.15.15
Posted by Jessica Rooney Deane
Comments: 2
 

American Style Pancakes

Almost every weekend, either before work or on my day off, I make american style pancakes for us as a treat. I started off using a basic recipe online but changed it a little bit to make it better. This mix should make around 10-12 pancakes. I usually add some chocolate chips to the different ladles of pancake mix, or marshmallows. You can add whatever ingredient you can think of, but make sure the added ingredient is mixed into the pancake mix or covered by the mix, so it doesn't burn on the pan.

You'll need:
1 tablespoon of baking powder
A pinch of salt (I use sea salt)
1 teaspoon of granulated white sugar
2 (medium or large) free range eggs (beaten)
30g irish butter (melted and cooled)
300ml whole milk
225g plain flour
1/2 teaspoon Madagascan vanilla
Some butter to use for pan.

What you need to do:
Melt butter in microwave and leave to cool.
Mix all dry ingredients (flour, salt, sugar and baking powder) in a bowl.
Add milk and mix thoroughly.
Add butter and mix.
Add eggs and vanilla and mix.
Heat butter on pan until melted (on a medium heat), and pour a soup ladle almost full of pancake mix onto the pan.
Wait until blisters appear on pancake and then flip.
Repeat this process.
Each pancake will take around 1 minute to make.

To keep pancakes hot while making the whole batch, turn grill on to a low settings and make sure the tray is as low as it can be. Put a plate on the tray and add pancakes to it as you go, to keep them warm. Top with cream or maple syrup, or anything you can think of. I usually use maple syrup and raspberries, which makes a delicious combo on a stack of pancakes.

Enjoy,
Jess x

tags: baking, pancakes, vanilla, american pancakes, brunch, breakfast, lunch, treat, recipe
Wednesday 07.08.15
Posted by Jessica Rooney Deane
Comments: 1
 

Dublin Pride - My first stall

I was asked to have a table at this years Hunt & Gather 'The Love Shack' at Dublin Pride in Merrion Square. I was so excited and a little nervous as it was going to be my first festival/event where I would be selling my prints. I wanted my table to stand out on the day while also looking pinteresty and cute. I was thinking fairy lights, glitter signs, and vintagey boxes. I made a lettering banner for the table saying "Treat Yo Self" using silvery starry card I had from the Art and Hobby shop and attached them with pink darning thread from Hickeys.

As this was my first event I had a lot of little things I needed to pick up such as frames to display some prints in, paper bags so people didn't have to carry their prints home, cards to go with each print incase they wanted to buy more online later, getting the actual prints ready, and so much more. I wanted my table to stand out but I also wanted it to look fun! I got most of my supplies in Evans Art Supplies such as the cellophane sleeves, backing paper, paper bags, etc. as they always have a good supply, it's cheap enough and so handy as it's in Dublin city centre. I also got my prints printed in Aungier Print as i've been going there for years now and it's always a great service and you always get such a high quality print.

cloud.jpg

I really liked how my table turned out in the end. It was very windy on the day so I had to improves with some rocks nearby, which turned out okay, though it wasn't the prettiest. (I'm going to create pretty weight for the next time.)

The entertainment that was on in 'The Love Shack' for the day was great, such as Morning Gloryville rave/pillow fights, Pettycash poetry readings (so moving!) and lots of amazing musical performances! It was a great day and amazing to see everyone enjoying themselves!

I also wanted to say a huge thank you to the ladies at Hunt & Gather for giving me the opportunity and experience to sell my prints somewhere and get a feel for setting up a table. It was great being able to see people's reactions to my work first hand. 

Looking forward to selling my stuff at the next market/festival thang.
Jess x

tags: Dublin, stall, pride, love shack, love, illustrations, prints, treat yo self, Hunt & Gather
Wednesday 07.01.15
Posted by Jessica Rooney Deane
 
Newer / Older

All rights reserved to Jessica Rooney Deane